Wednesday, May 4, 2011

The King's Throne

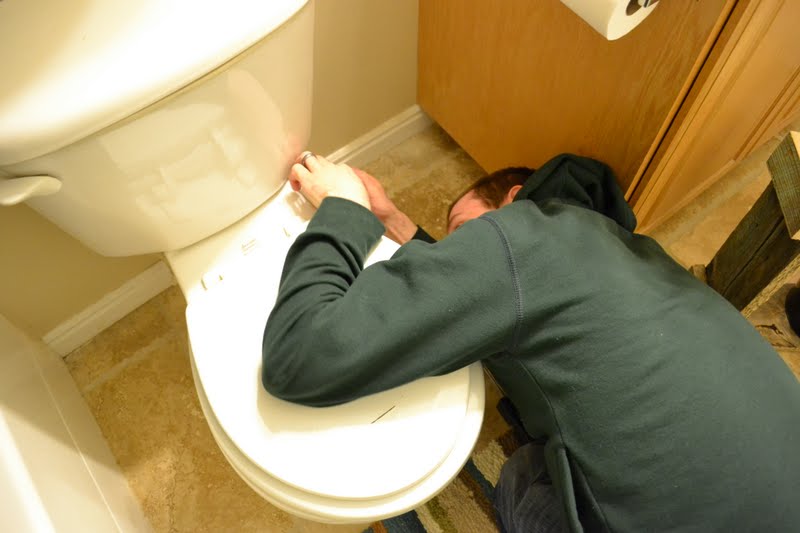
The standard of living rose at our house this week. We've lived with this toilet seat that 1. has a gnarly gash on the top and 2. the seat wouldn't stay up. Not like it's my problem... but I do love my husband and felt bad for him when he had to hold the seat up. We eventually discovered that if we shoved back the tank lid far enough the seat would stay up on its own. I know bad huh?
So I found the trick to get a new toilet seat. Use your current one as a stepping stool. I may have or may have not, broken the seat hinge while trying to drill into the ceiling...

 
My handy-dandy husband not only took off the old seat, installed the new one, but also cleaned the toilet while he was at it.
 
And all the anticipation paid off. The toilet seat now stays up all on its very own. Chris is so happy.

Tuesday, May 3, 2011

I broke a nail!

Like literally people. Going to the gym everyday is really paying off. First you have to hear the whole story....
So one day I saw this picture:

and I thought to myself, "me-likey!". So I started thinking Beach for the bathroom. Not like that is an original thought {I'm pretty sure lots of people do it}. But I like the feel of beach cottage. So we're going with it.

First things first in "decking-out" style you must usually start off by destroying something, making a giant mess, and forgetting to tell your husband until you're about 1/2 way done with the demolition part. That happened here and here when I built the Beachy-Peachy Window.

My main problem in building the Beachy-Peachy Window was that I wanted to hang towels from the bottom trim piece. When my awesomely-sucky crystal knobs fell apart, I figured I could work it out later and finish up the window so we could enjoy not walking all over wood scraps and tools in the bathroom. So what's the problem? I didn't put in any backing for the towel hooks.
So now that I've found my replacement crystal knobs how am I going to put them in? Of course in "decking-out" style with lots of tearing apart and making a mess. By this time I've got things going all up and around the Beachy-Peachy Window. So getting back in behind the Towel Hook trim board was a little tricky. First I cut a big hole in the wall {surprise surprise} The original towel bar's backing was right in my way... like right there. So I used a hack saw and cut it into 3 pieces, then used pliers to rip out the blocking that was secured by the worlds most manliest nails. {p.s. I had to do this twice, on either side of the center stud}.
 
Thats when it happened. I was going at the stupid blocking for all I was worth {also being careful not to disturb the peaceful surroundings I stupidly put in before addressing the issue of towel hooks}when I totally obliterated one of those manly nails. Broke it right in half. I'll show you I'm made out of metal.
So in the end, I got the old blocking out. Tah-dah! Ready for newer, badder blocking.

 Not like you can really see it... but that little 1/2" of board you see sticking down there, that's the bottom of a 2x12. That sucker goes all the way up behind the towel hook trim board. The old blocking was only 2x4's and way too low for my Beachy-Peachy Window trim.
And so ends the story of when I found out how awesomely strong I am. We've hit another road block in the crystal knobs... we'll see if that gets solved this weekend... till then, we have another hole in our wall.

Monday, May 2, 2011

Can I hear it one more time?

"I LOVE this kitchen". Yes I do. Would Chris survive if I turned our kitchen into my own mini version? I submit that he would not. But I loved that yellow flower pattern too much to let it sit idle in  my "I wish  I did that" box. So I decided to bring a little bit of it in.
Solution? I found way too good a price on {maybe} a way too huge canvas.

First I painted my canvas with yellow ochre. I didn't take any pictures... because honestly, let's face it. It's not all that exciting. I just watered down some cheap yellow ochre {not craft paint, I like to use "Basic" click here to see}.
To create my stencil I taped a few pieces of paper together, got out my trusty craft table {also known as laminate board}, stuck down a ton of blue tape, and got to drawing. I just eyeballed it {with a picture of it right next to me of course}. 
I exacto'd out all of the little tiny pieces, careful not to damage either the large stencil or the tiny pieces.
I used the large stencil to make sure all my little tape pieces would go in the right spots, and used the little pieces {one at a time} to trace and cut out the petals.... yeah this took a while. Like about 4 or 5 movies worth. I didn't do it all in one day. 
Before I was even done with the painting, I got cracking on the frame. I have a TON of leftover trim from an awesome CL find. The frame is made up of two pieces of trim. Can you believe they look so good together? I'm not a professional frame maker... but a few screws through the corners and attaching the two types of trim together and I've got a pretty solid frame.
Next I painted over all my tape-work with a mixture of cad-yellow and burnt sienna. I wanted to get a little bit of variation in my color. If you want a more solid look, go for yellow ochre. Peal off the tape and look what you've got! I might be adding in a little somethin' somethin' later. But for now here is my tribute to that beautiful yellow wallpaper.
You can ask Chris if he likes it. I know he'd at least prefer this over a perma-flowered kitchen! If you are wondering what is hanging from my dining chandelier... I'll solve the mystery for you now. It's my "Chuparosa"! It's a humming bird made in Huatulco, Mexico. If that doesn't earn me cool points, I think I'm doomed.