My goal in the Laundry Room has always been MORE STORAGE. What house doesn't need more storage? But I also want it to look good. After building new shelves (see here), I wanted to create a better & cuter way to store all our stuff.
Step 1: Find some free pallets.
I made friends with a local wood recycling company. I frequent their wood piles and find all sorts of treasures. When I needed some wood for crates and also for some other projects (Washer & Dryer Stand) I went and grabbed a few. The down side to re-using wood is you have to clean it first. Our poor living took a hit while I cleaned & gathered materials for various projects.
Step 2: Cut & Assemble.
There's no real rocket science to putting these bad boys together. I had different sizes & types of wood, so my crates all turned out different. Just make sure to use wood glue, pin nails, and screws to make them very sturdy.
Step 3: Cute-ify.
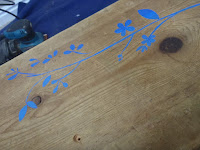
I printed & cut out fonts to use as stencils (some of the smaller fonts I have made out of plastic "make it yourself" stencils).
Step 4: Add some other stuff in.
The crates take more wood and time then I originally thought. So I've been on the lookout for cheap additions so I don't have to make crates for every inch of the shelves. I found the "bathroom" box at the DI for $4; and the footlocker below was from my husband's childhood. I re-finished it to match a cute canister my sister gave me ($5 from DI) and turned it on its side for quick and easy access to the cleaning materials inside. I also used a cabinet pull I took off a dresser I am going to re-finish for our bedroom (see here).
It is still a work in progress, but eventually I am going to have Bomb-Dig storage in our Laundry Room.


good work sommer. I saw these crates in the pictures from your washing machine stand project and decided to make some for our baby stuff storage. :D thanks for the idea!
ReplyDelete