Tuesday, September 25, 2012

I might be in trouble


So... Chris has been out in the wilderness on a school trip. He doesn't have any phone service, or any way to talk to me. I think this is a bad position for me to be in. With no Chris after work I got itchy for a project. Chris has no idea what I've been doing. I decided to declare war on my oak cabinets. It won't be the first time he'll come home to a surprise in progress. I think he first caught me in the kitchen painting a wall cranberry red. Then he caught me tearing a hole in the wall in the bathroom. Those were probably the biggest surprises so far. This one will top them both.

Refinishing cabinets is not exactly the quickest or easiest of projects. Especially now that I've decided that paint isn't for me, I just can't go from a wood to a painted wood. I know everyone does it. Has anyone noticed that EVERYONE paints their cabinets white? It looks great in all their pictures and all... but I just cant get myself to do it. (I've thought about it) but I've decided that I'm a stain kinda gal. I like my wood lookin like good lookin wood. My problem is, my wood isn't good lookin!

I've also looked into gel stains, which would make my sanding job way easier. But gel stains just don't come in the color I'm looking for. Anyone notice that EVERYONE who uses gel stains goes with a "java" color? Too dark for me. Reminds me of the dark wood trim that super old and dated houses have.

So I'm going with the most difficult option. Good old fashioned oil-based stain. That equals Sommer doing a TON of sanding. I'll have to get every stinking last fleck of existing stain off my cabinets before I can re-stain them. But I decided if I'm gonna do it, I've got to do it right.
I headed to a store that sells unfinished wood furniture. They have an awesome selection of wood stains, along with samples of what each stain looks like on different types of wood. (something you just cant tell from a computer printed brochure or off the side of a can). This crazy-cute old lady sold me an open can of the stain I thought I wanted (for $2!) and I took it home to try it out. I'm not sold on it. I think I'm looking for something more grey. I'll have to go back in and get another can. In the meantime I've been sanding.

And sanding... and sanding... and sanding like crazy. The worst part is, I have to do a lot of the sanding by hand. I can only do the flat portions with my handsander.

So not only do my projects get outta control when Chris is gone, but so does my hair, clothing, and apparently my face.  
One done... like a bagillian to go. I'm starting with the bathroom cabinet, so if I screw up royaly at least it won't be so bad right? Whew, I'm not sure what Chris will think when he sees what I've gotten us into. This is going to be one VERY LONG project!

Saturday, August 18, 2012

Balinese Dancers off the wall

Every year for the fair my family enters the art exhibit. I never win because the closest class of painting they can put mine in is "Southwest" (aka Country). They always pick cowboys. You'd think I'd learn my lesson, but these dancers are just so fun. This year I have some Balinese women dancers. I really like how her dress turned out, and her super athletic looking arm.
These are the last three years worth of paintings, just in case you were curious. 
My next problem is finding a place to hang the newest addition.


Sunday, July 29, 2012

Lion Coat Baby Shower Present

I'm no seamstress. Like for reals, I totally just make things up as I go. I use painter's tape, a metal tape measurer, eyeball just about everything, and try to get away with as little pinning as I can. But, I think this one turned out pretty cute. Since I'm no master of sewing, I probably won't go into super detail about how it all went together {mainly because I don't want to be laughed at for my tactics}. But I will try my best to make it look like I had some idea of what was going down.
The fabric cost me about $18. Chris actually picked out the super cute yellow poka-dot felt-ish fabric. I had no idea how much I'd need, so I just got a yard of the liner, yard of the main fabric, and just little pieces of the felt accents.
So, there's probably an awesome pattern I could have bought, or maybe even found online for free.... but I figured I'd save myself the time and effort, and just use a hoodie that I already had as a guide. I taped paper together and outlined what I thought each shape should be. {I kept all of them so hopefully I can repeat it again}.
A yard of fabric turned out to be more than I needed. 
I sewed the liner first. Mainly because that fabric was cheaper, and if I screwed it up royaly, it wouldn't be as expensive to buy some more.
I've never sewn arms before, but they turned out to be super easy. You just sew the tube first, and then sew them into the sleeve spot. Somehow that seemed like it was going to be way harder than it was.
The hood was actually harder than the arms. How it came together wasn't quite right at first. I had to alter my home made pattern a little and try again.
Once I had the liner, I did the exact same thing with the main fabric.
Then came the fun part. The lion accessories. First I sewed little ears.
Then I sewed a little mouth.
And a little nose. You can see in this picture, I also made a brown partner for the white part of the mouth. Later I "sandwiched" the hood with the brown and the white.
To insert the ears I sliced a little line in the hood and stuck the ears through. Then I just sewed across it, making sure to get either side of the hood just a little so no unraveling would come later.
Once the ears were done I sewed on the little nose to the hood and the mouth. {The mouth is not yet sewed onto the hood} I also sewed little dots for whiskers. They might be my favorite part of the whole thing.
The eyes came next. I wasn't sure what I was going to do, so I experimented with some felt and buttons. I also was testing out this trim to see if I liked it. I pinned it on while I worked with the eyes to see if I would end up liking it. I never did, so I eventually unpinned it.
I sewed the eyes on the same way I did the nose, with a tight zigzag stitch around all the edges.
He looks a little creepy with just black eyes...
My new idea for the mane was yarn. This yarn even is "LionBrand" so I figured it was destiny. It took me a little to figure out how I was going to do it. But since the yarn is so soft and fluffy, loops seemed like the only option.
I made little loops and sewed with a zigzag across them to hold them together.
And here is the little tail all put together.
The mane was a little trickier. I crocheted a chain as long as I thought the main should be, then zigzagged yarn back and forth while I sewed down the middle.
It really worked out better than I expected.
Trying to sew the mane on was probably the hardest part of this whole deal. Because you are pretty much sewing blind. The mane is so fluffy, and the hood so roundy that you really have no idea where you are exactly.
I was impressed with myself when I flipped it all back around and the mane looked great.
Sewing the liner to the main fabric was very exciting. I pinned everything back that I didn't want to get in the way, and went to town. I was surprised how well everything lined up. The hood seams are a little off from each other, but since the mouth covers the first couple inches of it anyways who will be able to tell right?
I was most excited for the little claws in the arms.

I sewed them to a little cuff {to hide the seams on the inside} and they went in super slick.
I sewed the two mouth pieces on, with little teeth in there too, and also sewed the tail in. The buttons are the final touch.
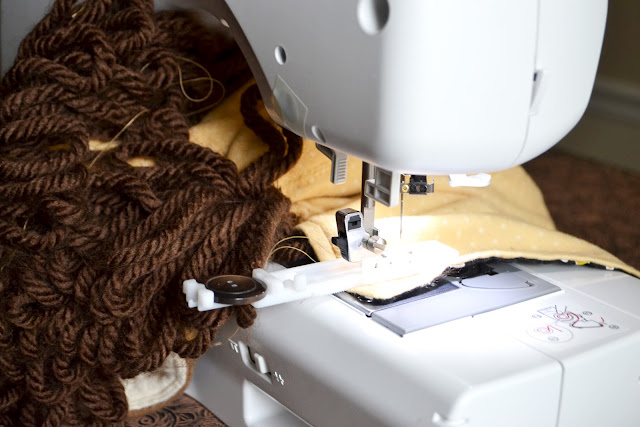
My sewing machine ain't no super fancy sews everything for you kind of machine, but I have to admit, it sews button holes like a boss. Maybe this is nothing fancy for some people, but I feel spoiled everytime I use it. My special button hole foot has a spot for you to put the button you are going to use, then the machine can read how big it is and it sews the button hole for you perfect. Seriously, I just hold the foot pedal down and watch the magic happen. No one wants to see pictures of me sewing on buttons, so lets skip to the end.


And there is a lion coat for a 3-6 month old. I don't know about you guys, but I'd feel cool carrying around my kid wearing this.
Oh yeah, at the end I wanted to check to see how similar to my guide hoodie my lion turned out to be. Looks like a pretty close match. BAM. I'm pretty happy about it.

Saturday, July 14, 2012

Quick 'n Dirty Baby Shower Gift

I don't know about you guys... but I feel like I have quite a few baby showers to go to. Some of them, I'm not quite sure what to do. Gift cards are always bomb to get, but not so much fun to give (where's the creativity?). So I made a gift card a little cuter. Not to mention I had the gender wrong on this one... she was having a girl. I'm so glad I didn't get her a onesie with a tractor on it or something.


Friday, June 29, 2012

Cleaning grout, someone has to do it


We noticed that our grout was getting a little.... sludgy. Cleaning grout isn't anyone's favorite passtime. But it sure was worth the effort (which is quite a bit if you aren't prepared for it, its not like a 5 minute thing). 
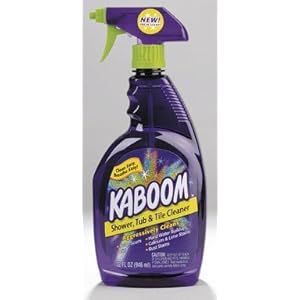
Church And Dwight Co 35015 KaboomSpray Cleaner
Our newly discovered, favorite, fantastic grout cleaner is Purple Kaboom. You spray it on, wait a while, scrub a ton, and wash it off... and KABOOM! Clean grout.
Chris even rented a carpet cleaner (Albertson's was the cheapest around here) and cleaned all our carpet. BAM! Super clean everywhere!
Wonder where our couches went? Breakfast was interesting the next morning....