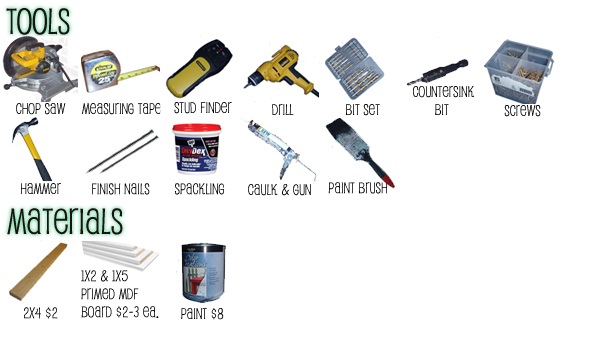
The inspiration for the faux beam came from my parents house. They have a beautiful, real beam separating their dining room from their kitchen. My beam (much smaller than my parents) does do a great job separating my living room from my dining room. It adds great detail and looks like a million bucks (although it only cost about $20)
{Special thanks to my Dad on this one!}
First we found where the trusses were in the ceiling and marked them with nails {this also helps to call your stud finder's bluff, since they aren't always so accurate}.
A 2x4 serves as the framing for the beam. We cut the 2x4 a little smaller than the opening to make sure it fit. And also, if you want to get fancy, to control expanding and shrinking. Here my dad is making sure that the 2x4 will fit.
We figured the entire beam should be about 5" deep {that's what felt good to us since we only have 8' ceilings}. I also wanted the bottom to be recessed sightly. So taking into consideration the thickness of the 2x4, MDF board, and the 5/8" recess, our little framing studs only needed to be 2 1/4" tall. We made sure to put the little framing studs not where the trusses were, so that the 2x4 would be easily attached.
Next came the 1x5 MDF board on either side, and on the bottom.{On a side note...from these pictures it looks like my dad did all the work, which is close to true, but I did pitch in quite a bit in between taking pictures.}
The 1x2 MDF strips came next. For a cool effect we overlapped the 1x2's over the wall a little, so it looked like the beam was integrated, my idea. 


The little 1x2 vertical pieces went in with just some finish nails. Then everything just needed set, puttied, sanded, caulked and painted.
Good tip for caulk: keep a cup of water nearby and wet your finger frequently. It makes everything go so much smoother, literally. Also don't be like me and paint too soon. The caulk needs to set up for a day.
And there is an awesome looking beam, for just $20. Honestly, it has been one of the best projects we've done, and probably gets the "most bang for your buck" award from me.


Wow this makes such a difference! Great thinking!
ReplyDeleteSommer, the beam adds so much character. Looks great! So glad I came across your blog. I'm a new follwer.
ReplyDeleteNice. I can think of about six places in my house where I need one of these. What a great idea!
ReplyDeleteLove that idea! Your dad did a great job! Looks awesome!
ReplyDeleteThis is fantastic! I have been looking for a way to separate my front hall from my living space and I think this could do the trick! Thanks for the tutorial!
ReplyDeleteNice job! I have also seen some faux beams that come pre-made made out of foam (http://www.owtraditions.com). Most of those faux beams have a heavy wood texture though. Made a nice difference to your room.
ReplyDelete